Monday, April 29, 2013

More Sweater Pillows!


I recently posted a tutorial on how to make
what I'm calling, "Sweater Pillows."
I am continuing to make them
and loving it!

I am only limited by the sweaters I can find!


Wouldn't this set be perfect at holiday time?


Or, how about this set?


This pretty moss green set is from a
sweater I hand knit several years ago.


What could be more "right" than
up cycling and re purposing a well loved sweater?
Be sure to visit my Etsy Shop to see more.


Thursday, April 25, 2013

Eating What You Crave vs Craving What You Eat


I'm a firm believer that eating habits are just that..."habits."
If you eat something often enough, you'll begin to crave it.
Without a doubt, I know I'm addicted to sugar
and need to eat less of it.
Don't even let me get started on chocolate,
or ice cream.
With that in mind, I've been looking
for some healthy alternatives.


Last winter I discovered frozen blueberries.
Yes, I know, there's nothing new about frozen blueberries.
I had just never bought them.


I also discovered I could add 1teaspoon of vanilla extract to
a quart of plain yogurt
and get a pretty good vanilla yogurt.


(You must stir it completely to get the vanilla mixed throughout.)


Because the yogurt I buy is also sugar free,
I add sweetener each time I have a bowl.
I use Equal, but (a little) sugar or honey would work great too.


Top the yogurt with the still frozen blueberries.
Now go take care of some morning business,
walk the dog, start the coffee, make your bed,
unload the dishwasher, you get the idea.


Soon, those blueberries will be thawing
and releasing their juices.
Yum, this is so good,
and so healthy.
I've been having it for breakfast most mornings
for quite a while and now find
it's exactly what I prefer for breakfast. 
Why not train ourselves to crave some
healthy foods?
Have you found some healthy foods you actually crave?

Linking to Foodie Friday at Rattlebridge Farm

Sunday, April 21, 2013

The Curtains are Done! The Curtains are Hung!


I'm loving this fabric combination.
I bought the fabric two weeks ago
and already the window treatments are
sewn and hanging.
Whew!
I've been boring everyone I know about
wanting to make this change for more than a year!
Two other fabrics were purchased last year,
but I decided they were not "right."
So, it's actually been a long time coming.
The treatments are ultra simple,
so the sewing did not take
a huge amount of time.


My entry, living room and dining room
all flow together,
so I needed the same fabrics for all
three areas.
This is the window seat in the dining room.


This double window is in the entry beside the front door,
to the right...


...If you turn to the left you see the living room,
and a bit of the dining room.
(See those two square windows on either
side of the fireplace?
That's another long term project.
I hope to find, or have made
stained glass panels for them.)


I don't need the bottom cafes in the living room
because I have roll up wooden shades there.
These windows over look the porch and the street out front
and the roll ups are usually open during the day.


This is the view from the living room into the dining room.


The dining room again.


And finally a view back to the entry from the living room.
I'm delighted with the freshness this change brought.
I also went through and did a bit of decluttering.
I have so much stuff I really like,
but I have to remind myself,
I simply cannot have it all out at the same time!
Can you see why I needed the same fabrics
for all three spaces in my little cottage?

Join me this week at
Tweak it Tuesday at Cozy Little House
Wow Us Wednesday at Savvy Southern Style
Open House Party at No Minimalist Here

Thursday, April 18, 2013

Mission Accomplished Part II


I've put in some serious sewing time this week,
making new window treatments for
my entry, living room and dining room.


I usually contain my sewing projects to my sewing room,
but dealing with the yardage needed for curtain making,
forced me to move to the dining room table
for the cutting portion of this job.


I purchased thirteen yards of the blue graphic print and...


...six yards of the floral
(not to mention, seven yards of lining).
That much fabric needs to breathe...


It's always a little scary for me to make the first cut.
Did I measure right?
Did I calculate right?
Have I thought it through well enough?


But, cut I did.
The bottom cafes and their linings all ready to be sewn.


I'm using these nifty little rings with hooks


for the top valances.


I'm making a very simple valance.
It will be made up of a series of squares,
the two fabrics, sewn together,
then folded diagonally with
two inches of the back fabric creating a boarder.


Can't wait to show you what they look like hanging!

Sunday, April 14, 2013

Mission Accomplished!


Last weekend my sister Nancy and I took a trip to
Fayetteville, Tennessee, where our parents live.
It was a lovely family weekend and we celebrated our
Dad's birthday with our brother Bill and his wife Pat.
However, the weekend had a second purpose for me.
I cannot go to Fayetteville without visiting
one of my "happy places."
I have been on a long hunt
for fabrics for new window treatments...


In the dining room - going soon.

in my entry, living room and dining room.
I found it!
Finally.
I had actually bought fabrics last winter to redo them,
but for some reason had not gotten around to making them.
In the meantime I've been rethinking my redecorating plans
for those rooms and decided the fabric wasn't "right."
So, I hoped, hoped, hoped I'd find something at
Sir's that would work.


In the entry...goodbye!
Then I saw the yellow fabric above.
It totally hooked me with the blue twigs.
Who can explain why we fall in love with
some things and not others?


Living room - time for a change!
I'll be coordinating the yellow above with ...


...this pretty blue graphic.
I know these fabrics are "right" because I could hardly wait
to get started on the new window treatments.
I started cutting yesterday...
Updates to follow!!!

Wednesday, April 10, 2013

You Can Do a Lot with a Cake Mix (Idea #1)


One of my "Kitchen Truisms" is
"You can do a lot with a cake mix."
Here is one of my favorite uses.
It's so easy, it's almost a crime.
This recipe comes from my sister(in law), Terry,
and it's absolutely the best thing she ever gave me.
I use it a lot.
It's one of those recipes passed by word of mouth
and I'm not even sure of it's name.
I call it
Fruit and Cake Crumble.


You'll only need three ingredients.

Coat a large baking dish with cooking spray.


Spread two cans of pie filling in the bottom.
You can use any flavor you like.
I've tried them all, and they're all good.
In addition to cherry, I also favor
blueberry and apple.

Sprinkle a box of yellow cake mix over the fruit.


Cut a stick of butter into chunks...


...and dot the top of the cake mix with them.
Please, DO NOT use anything but butter here,
it just won't be as good.


Bake at 400 degrees for 30 minutes.


Serve, hot or cold,
with ice cream, on top or bottom.
It's a gift from the gods....
Other than indulging in this dessert,
I really like it because you can always keep
the ingredients on hand.
It makes a great dish when you want
something to take to a neighbor or friend.
Put the coffee on, I'll bring dessert...

Wednesday, April 3, 2013

Taking the Plunge with Chalk Paint


I love the look of painted furniture,
but have never had the nerve to give it a try.


Until now...
At the beginning of this year
I decided I had too much brown in my house
and planned to lighten things up as bit.

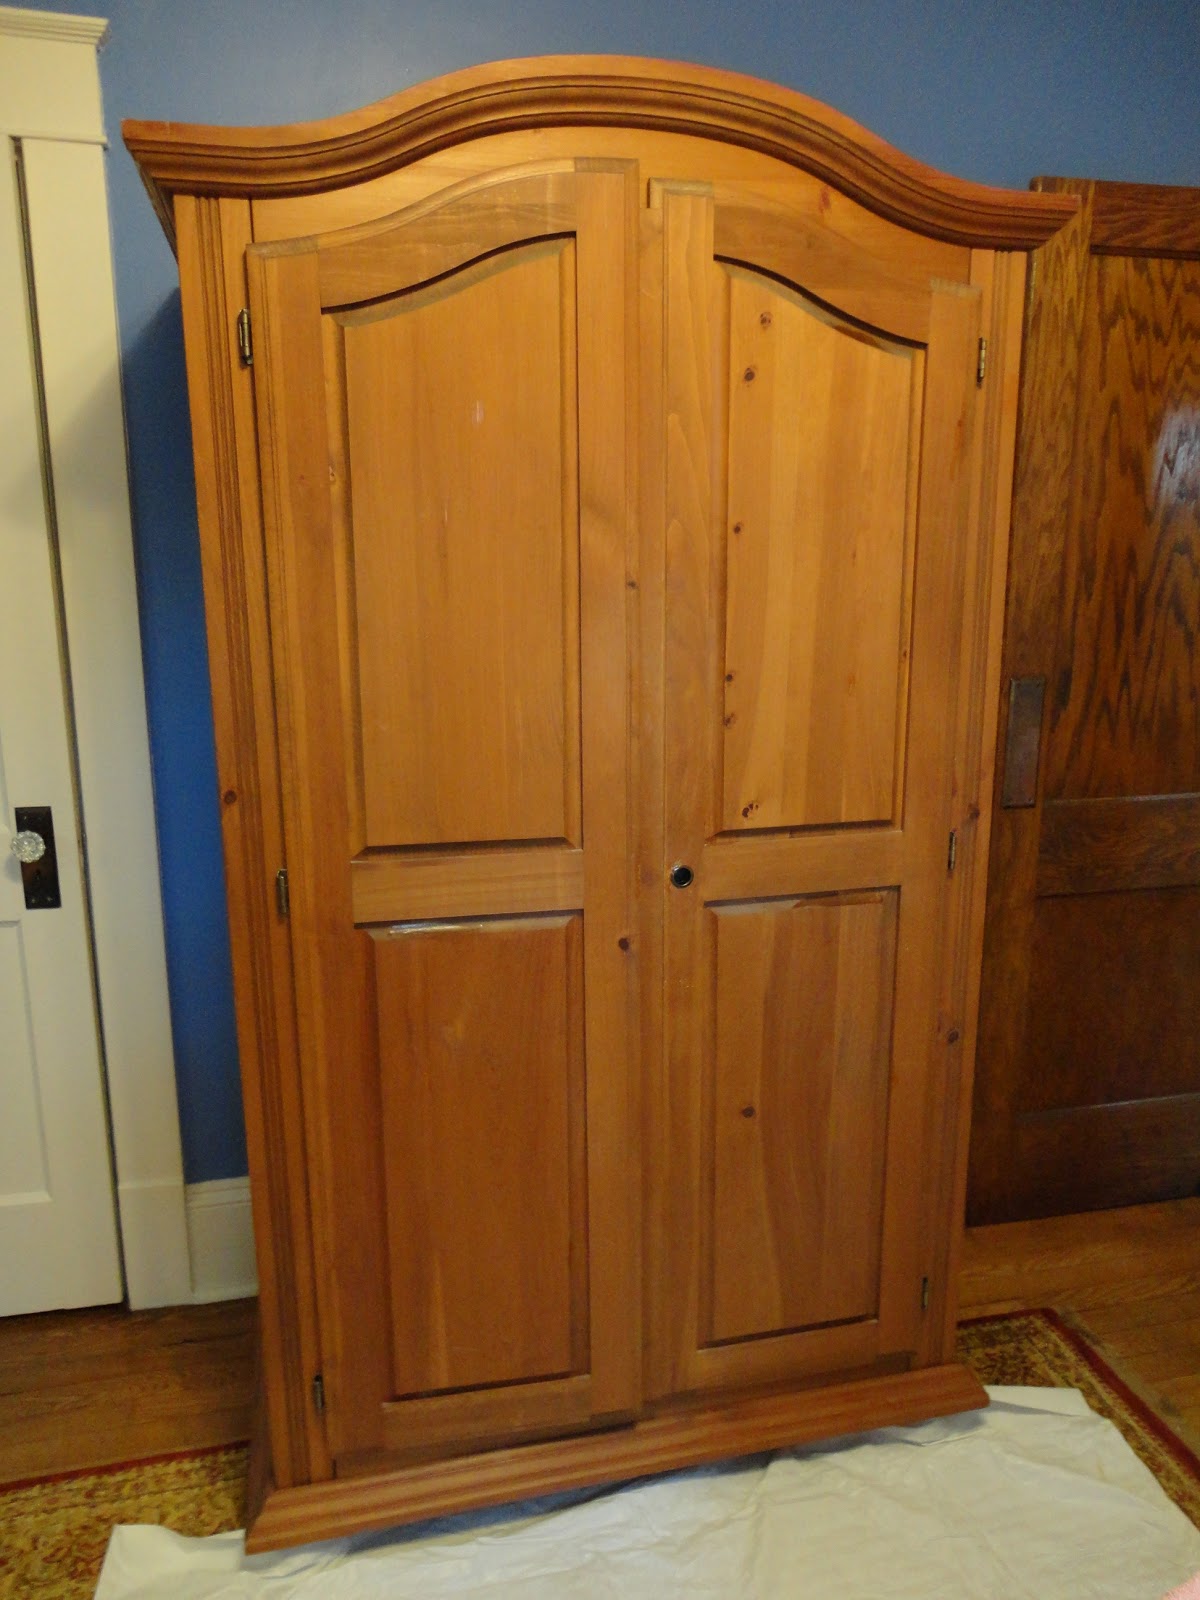
Although this pine wardrobe is
too big for my bedroom, where it resides...


...it serves as fabric storage.
(We won't discuss the messiness,
it's on my "To Do" list.)
So, I can't get rid of it.
But let's face it,
there's a LOT of brown here.

I've been a long time follower of Sherry at
and been totally inspired by her painted furniture.
She even gives a tutorial about making your own
So with notes from Sherry's blog in hand,
I took the plunge and painted my wardrobe.


As mentioned earlier,
this wardrobe is big,
and heavy (it also houses an old style television).
So I had to work with the wardrobe in place.
I spread lots of plastic over the floor and rugs.


More plastic was draped inside,
over the fabric.
I did not paint the inside of the wardrobe.
That's a job for another time...
another lifetime...


Too late to turn back now.


First coat is on.
It was a little scary at this point
because, quite frankly, it didn't look good
I guess that's why God invented second coats.


Second coat on and finished!!!
I'm not giving a lot of details on "how-to" here
because you can find much more in-depth
instructions from those
much more expert at it than me
here in blogland.
I haven't done any distressing on it yet either.
I'm thinking I'll live with it like this for a while.
I think the distressing is where the real
artistry comes in and thus far
I have a fear ruining what I've got.


And for now,
I'm loving how it has lightened up my bedroom!
(Thank you Sherry!)

This week I'm linking with
The Open House Party at
No Minimalist Here
Related Posts Plugin for WordPress, Blogger...